
How to Enroll a Client in a Series
There are a few different places in the Dashboard where you can enroll a client into a Series.
From the Series List
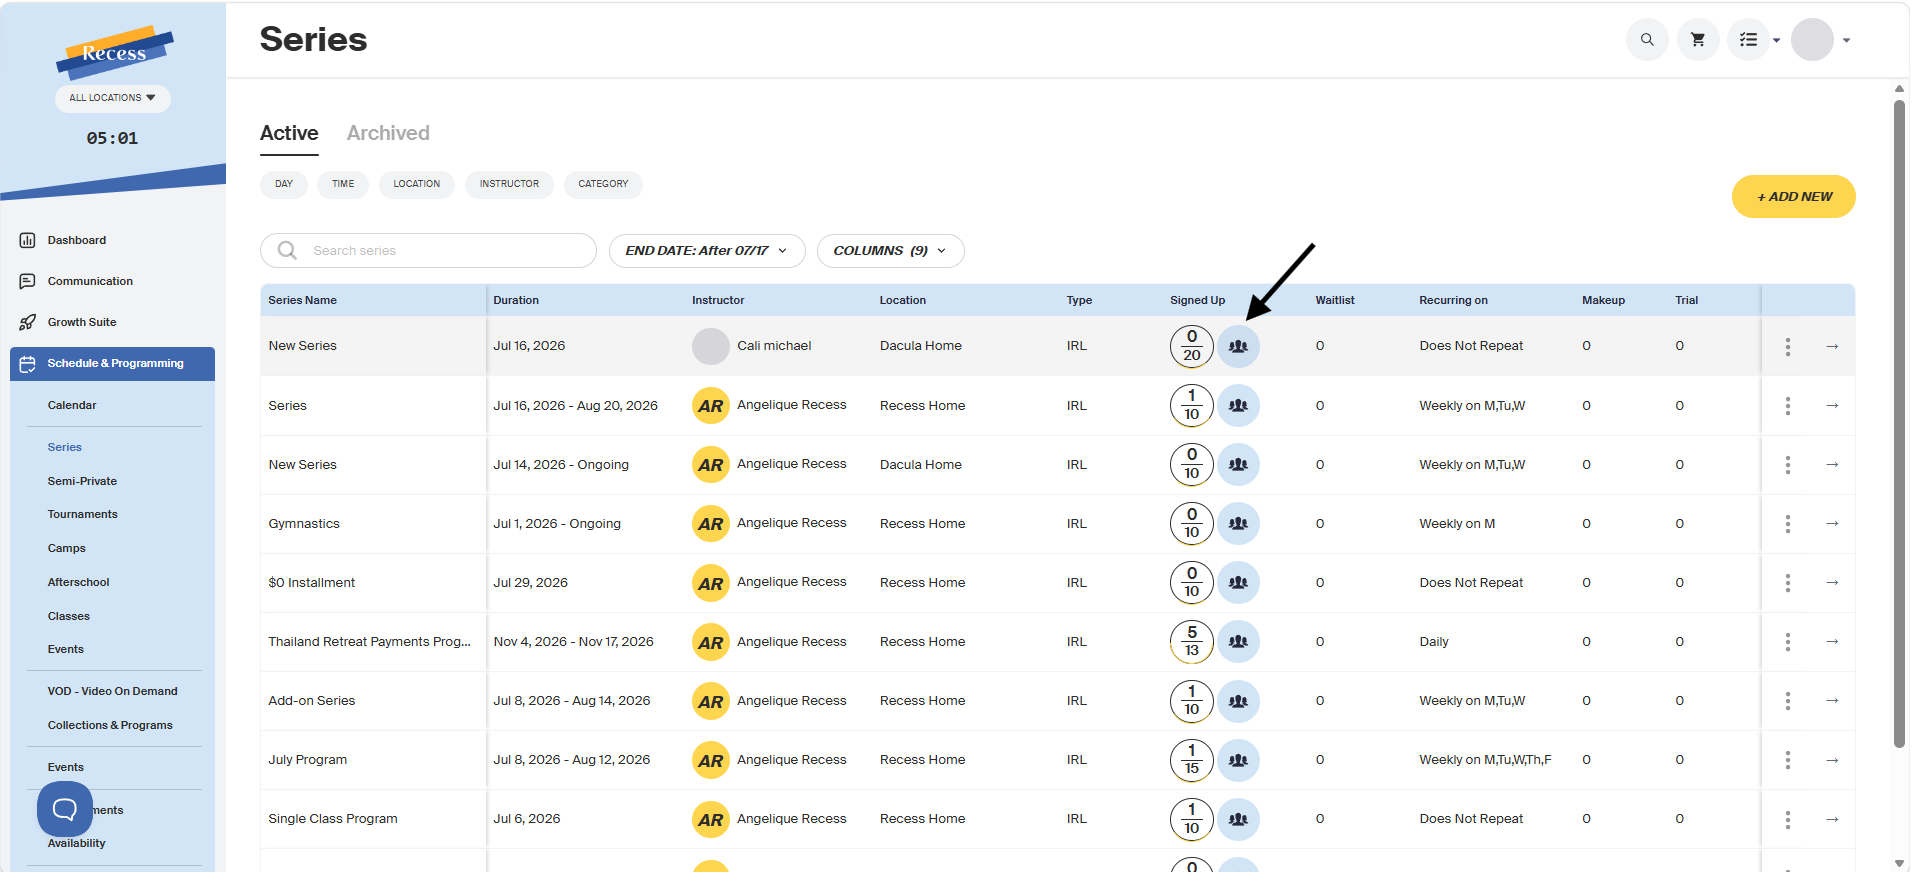
- Go to Schedule & Programming > Series.
- Click the people icon next to the Series you want to enroll a client into.
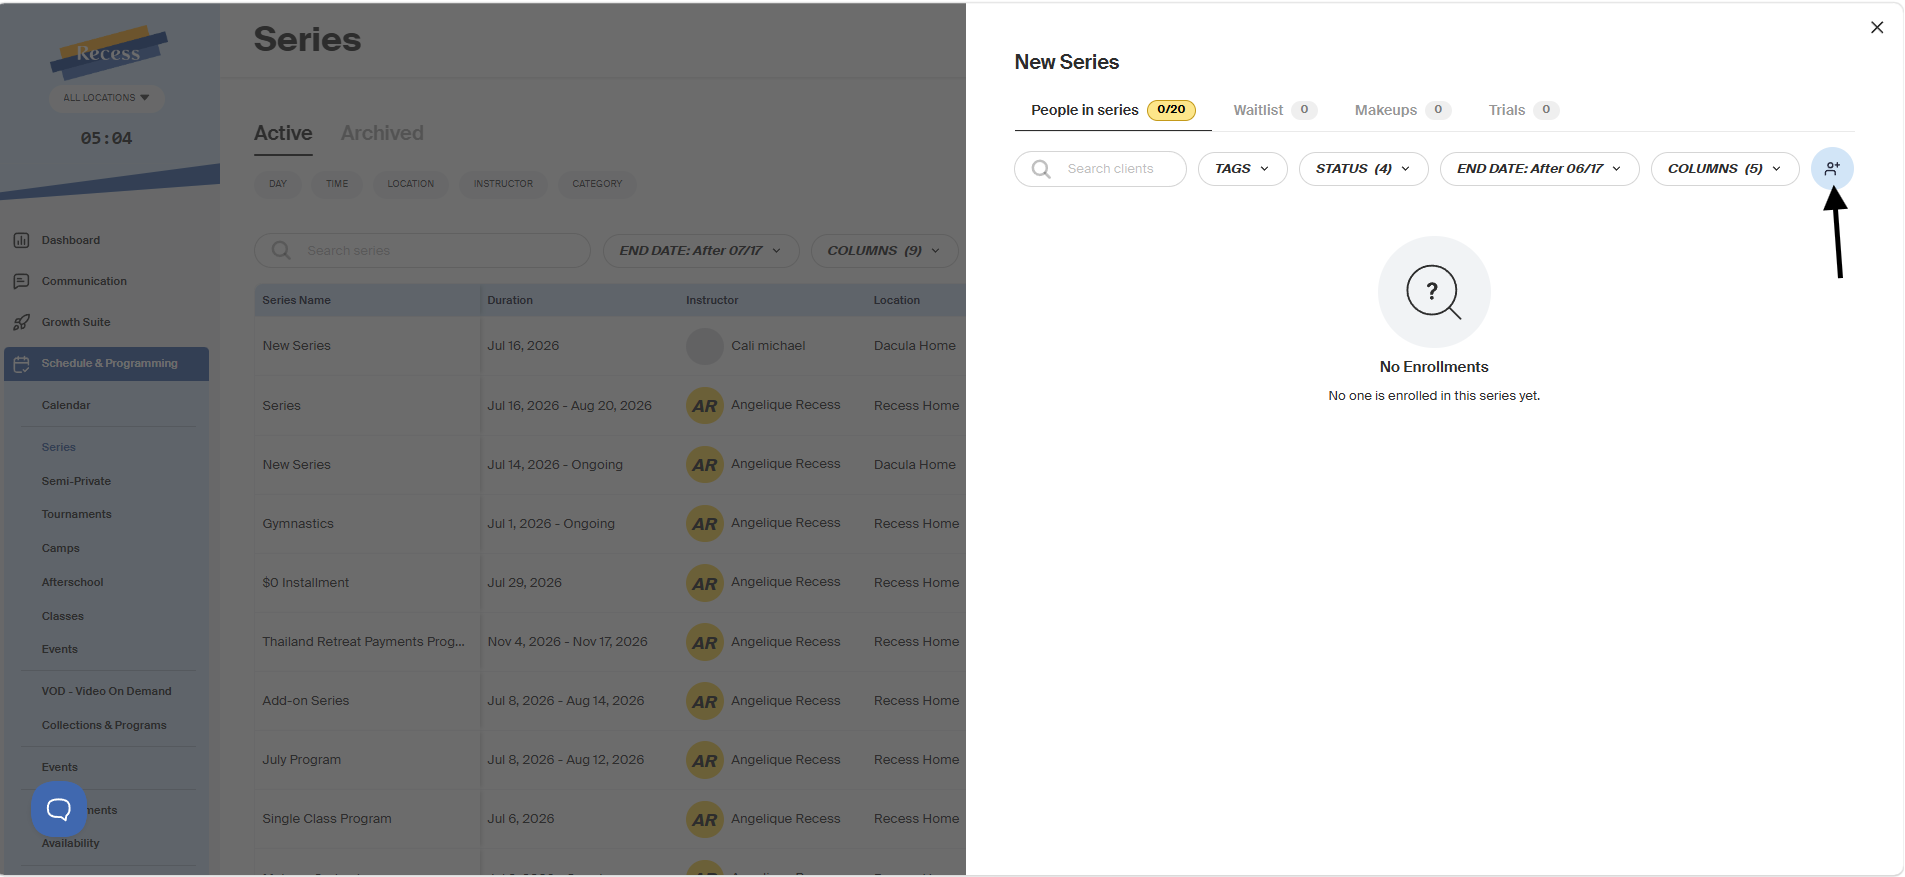
This opens the People in Series panel. Click the Add Client icon in the top right to start an enrollment.
From the Class Template Details Page
- Click into the Series itself from the Series list to open its Class Template Details page.
- Click the people icon in the top right.
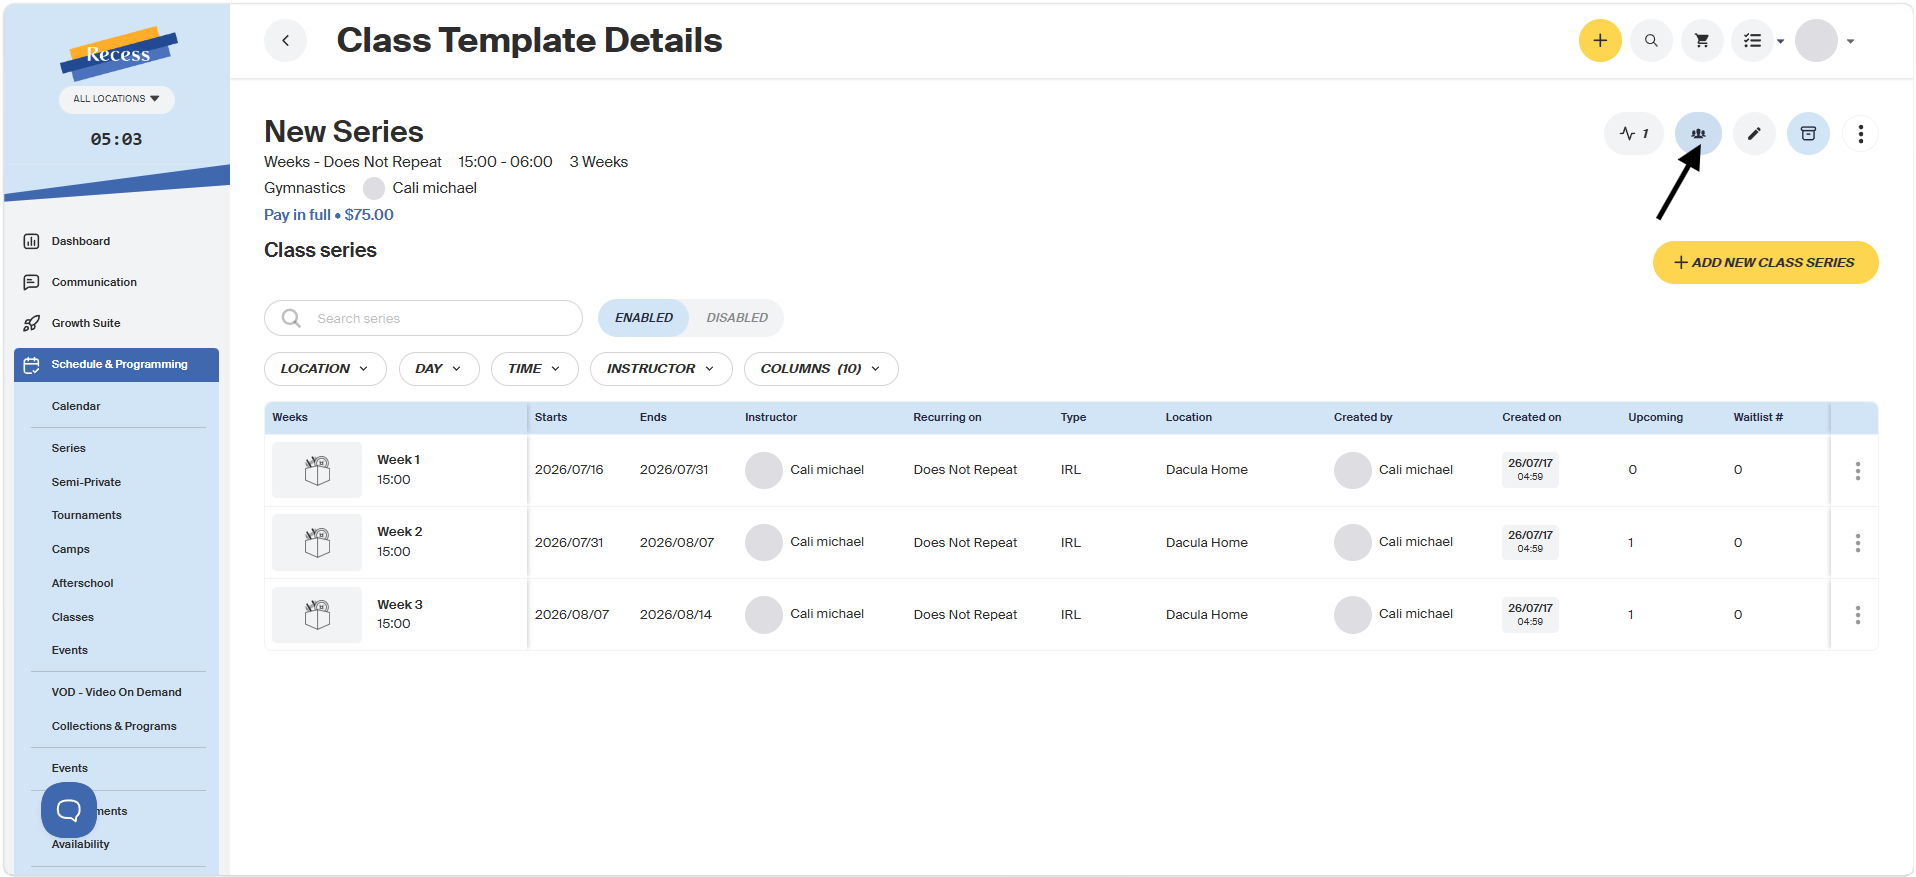
This opens the same People in Series panel as above.
From the Class Template Details Page
- Click into the Series itself from the Series list to open its Class Template Details page.
- Click the people icon in the top right.
This opens the same People in Series panel as above.
From an Individual Class
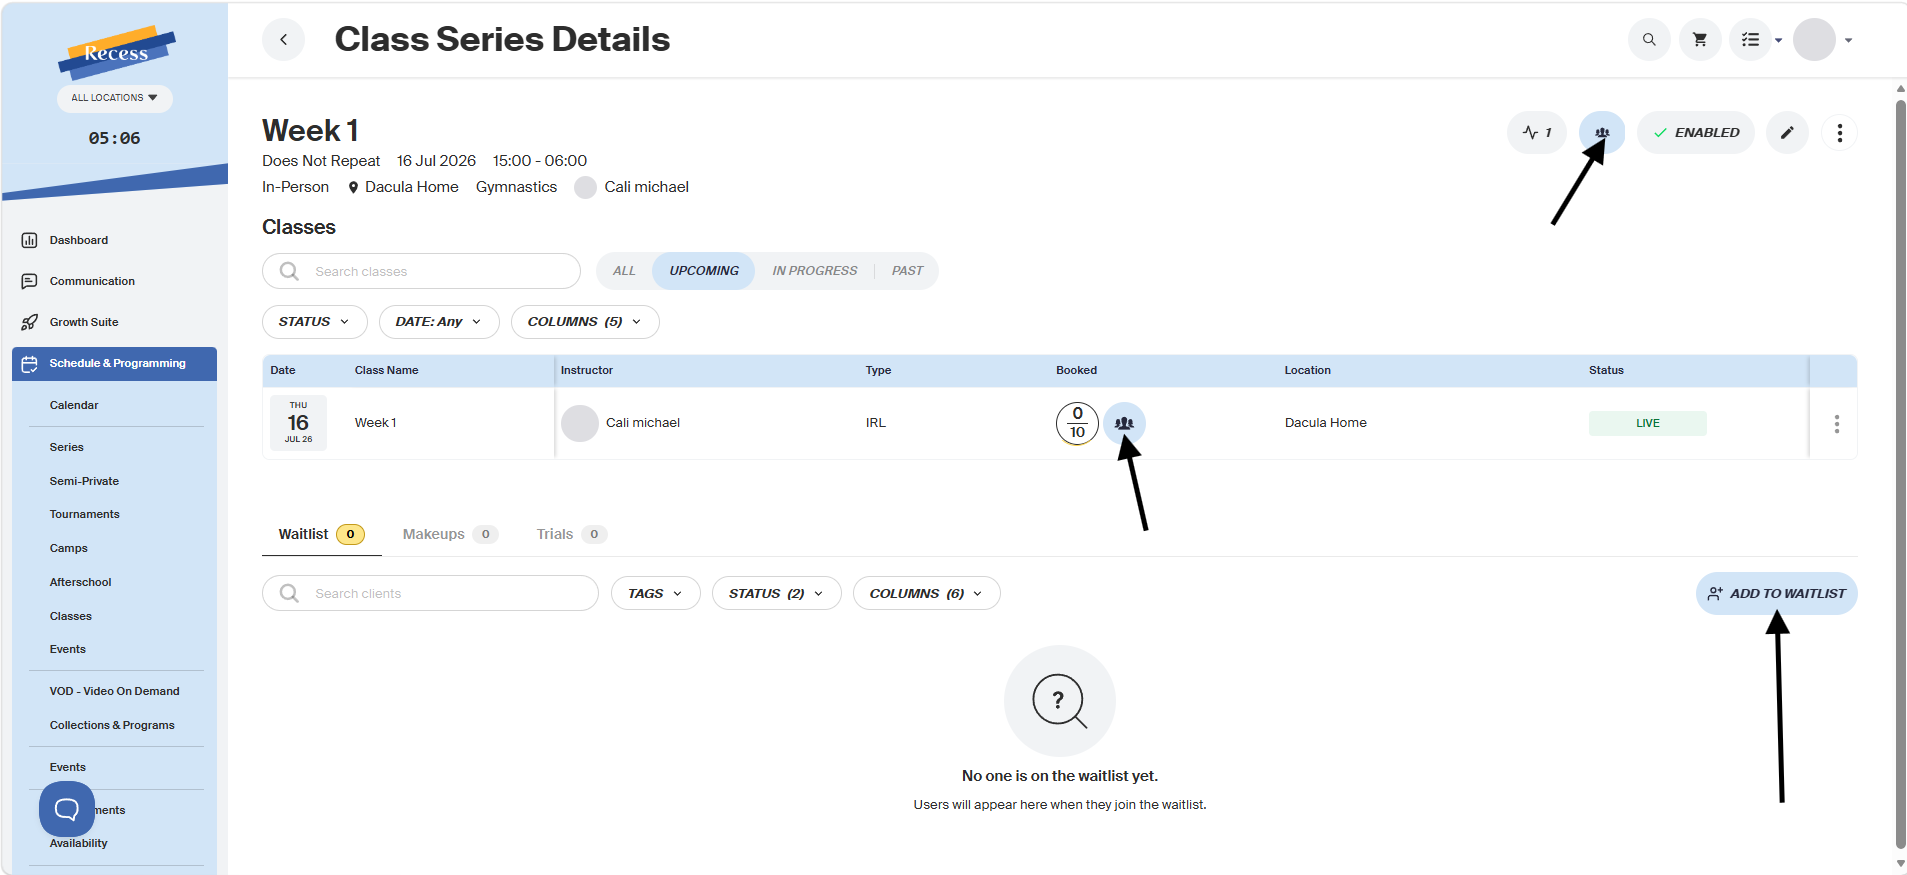
If you want to enroll a client into a single class within the Series rather than the whole thing, click into that specific class (e.g. Week 1) from the Class Template Details page. From here you have two options:
- Click the people icon to enroll a client directly into that class.
- Click + Add to Waitlist if the class is full and you want to add the client to its waitlist instead.
From the Calendar
- Go to Schedule & Programming > Calendar.
- Click the specific class occurrence you want to enroll a client into.
- Click Add Client.
Choosing Which Weeks to Enroll
If you're enrolling a client into the whole Series (rather than a single class), a window opens showing each week of the Series with its date range, time, and price. Check the box next to each week you want to enroll the client in, then click Continue.
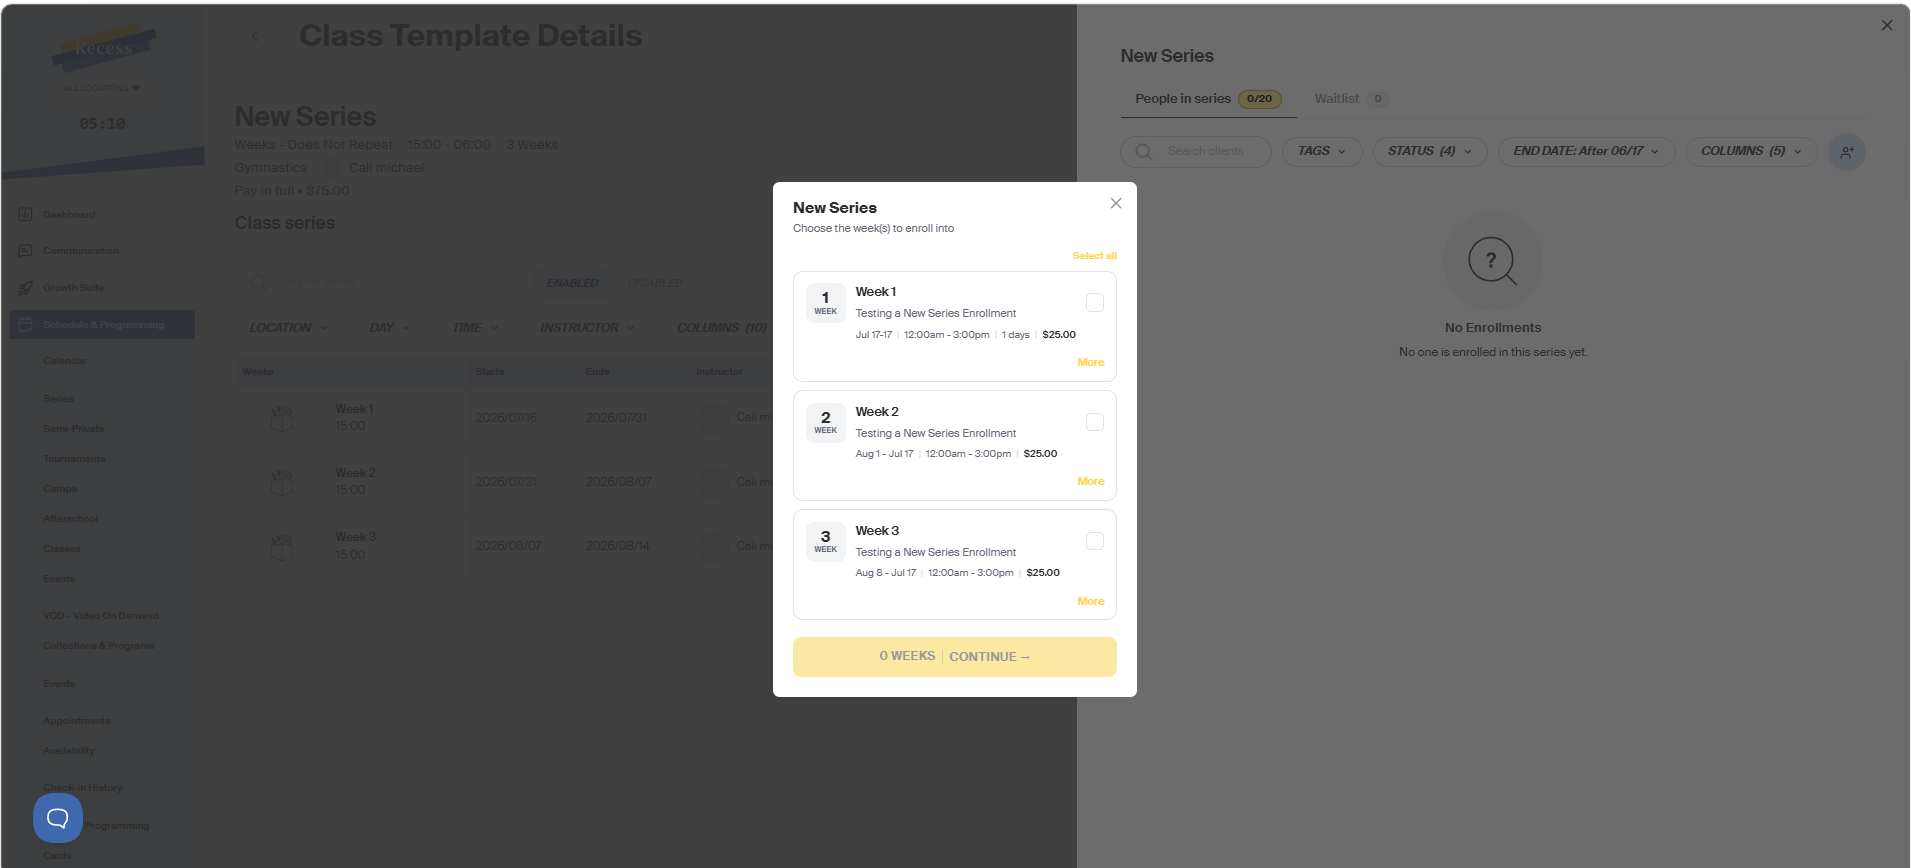
Note: This is also how a client gets enrolled into only part of a Series rather than the whole run — leave the weeks they shouldn't attend unchecked. There's no separate mid-series enrollment step; checking a subset of weeks is the mechanism. Pricing applies per week the client is enrolled in, not as one coordinated charge spread across all weeks.
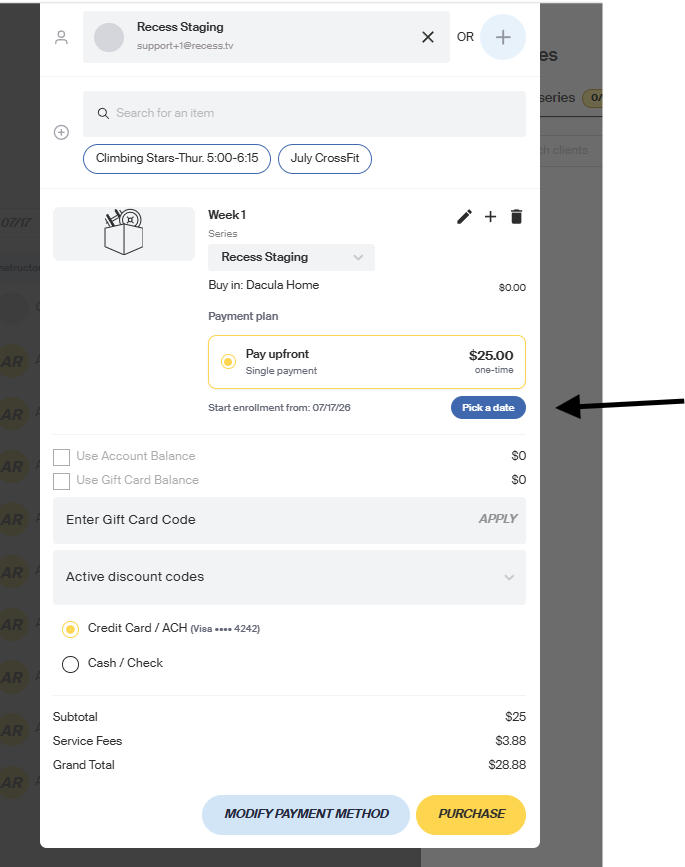
Choosing a Start Date
For an ongoing Series (like a Semi-Private that doesn't have a fixed end date), you'll set the client's start date directly in the cart using the date picker, rather than on a separate screen.
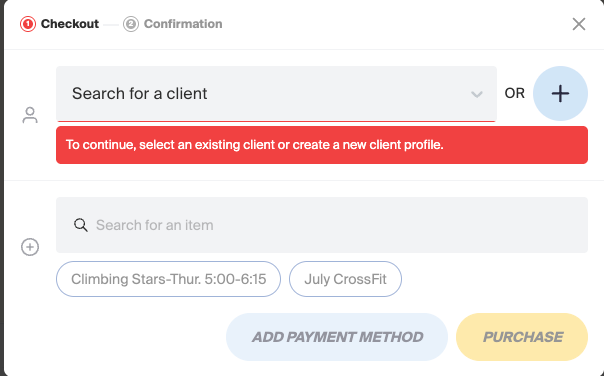
Selecting the Client
Search for the client you want to enroll. If they don't have a profile yet, click + to create a new one. This same search step appears whether you're enrolling into a single class or a whole Series.
Checkout
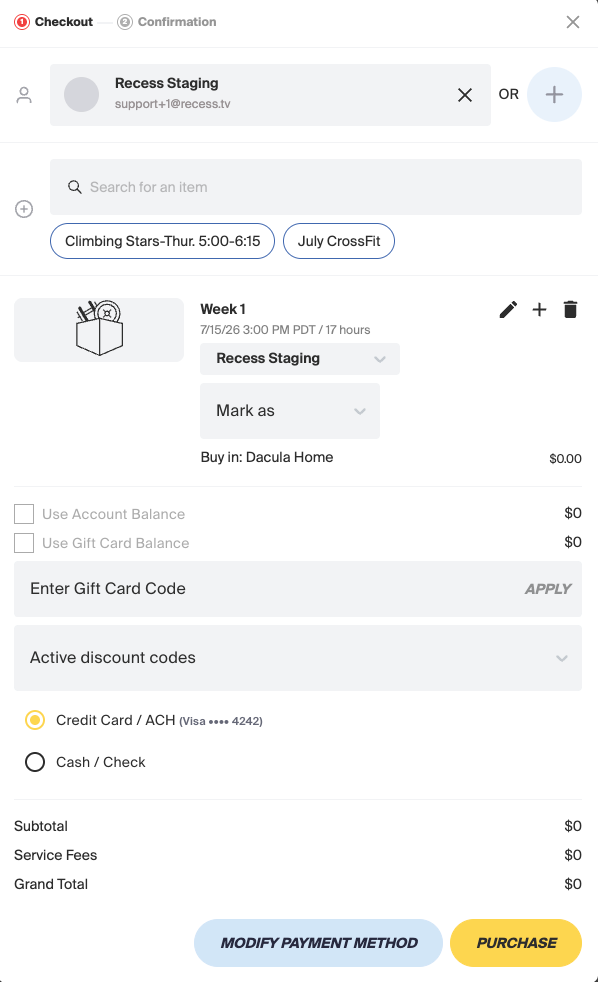
Once you've selected the client, you'll see the checkout screen:
- Mark as — use this dropdown to flag the enrollment as a Trial or a Makeup, if applicable.
- Use Account Balance / Use Gift Card Balance — check these to apply either toward the purchase.
- Enter Gift Card Code — click Apply to redeem a gift card.
- Active discount codes — apply any relevant discount code here.
- Choose a payment method: Credit Card / ACH or Cash / Check.
- Review Subtotal, Service Fees, and Grand Total.
- Click Purchase to complete the enrollment.
Cancelling an Enrollment
You can cancel a client out of a Series from either of these places:
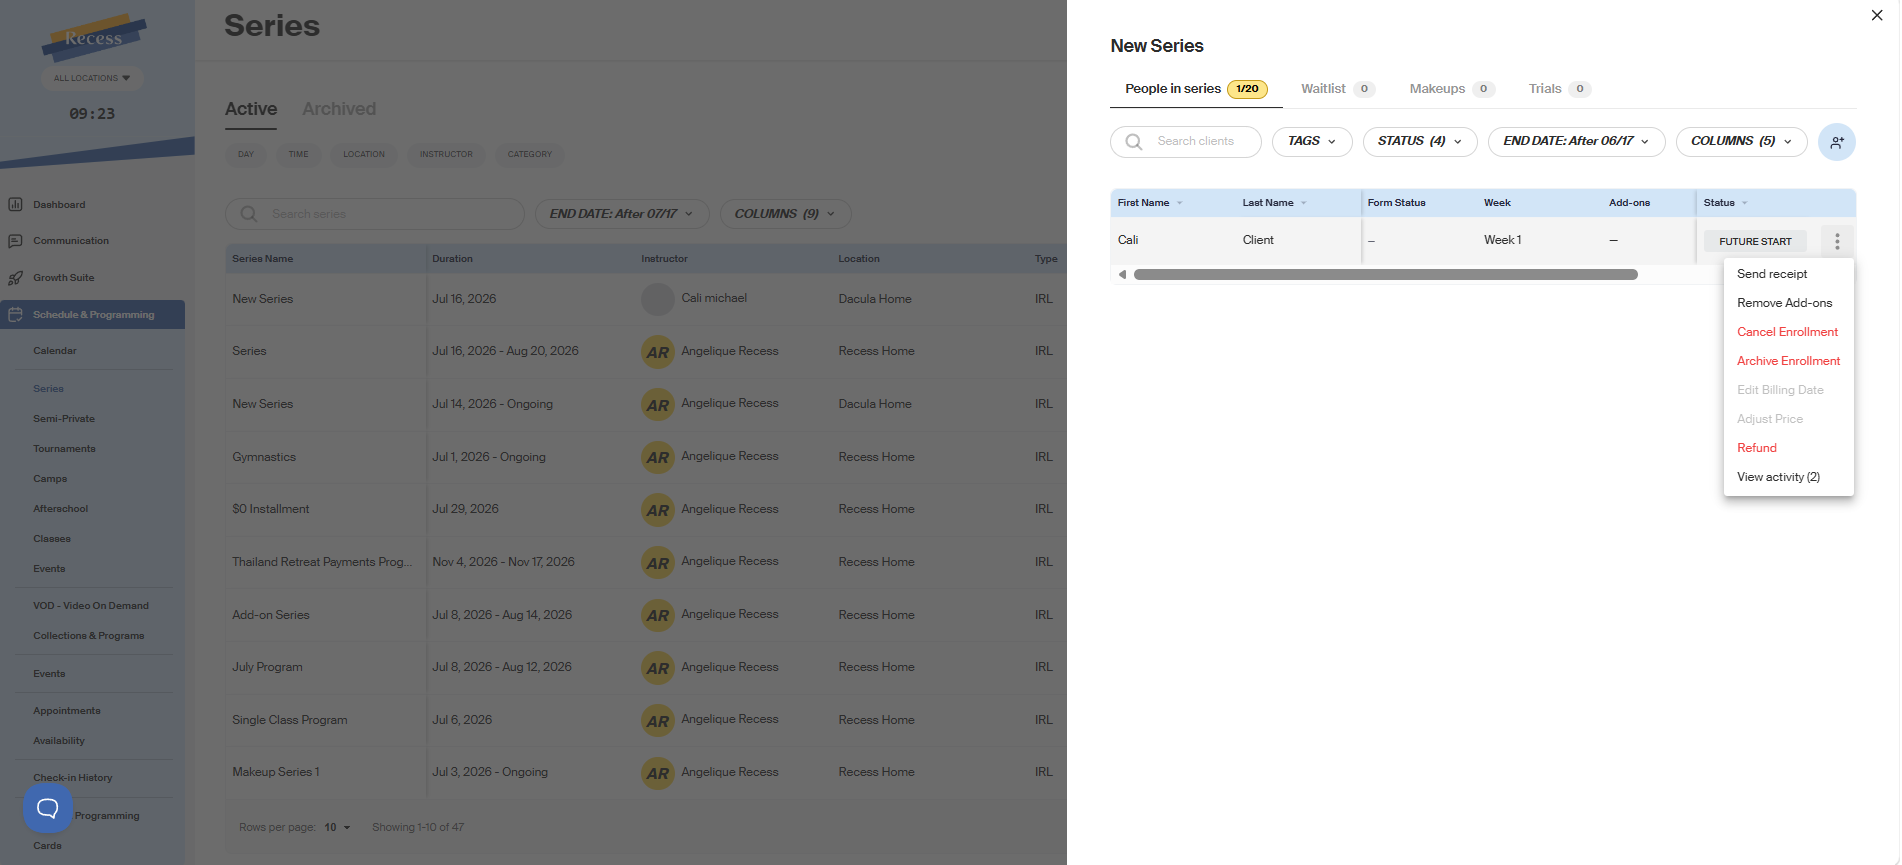
- From the Series — find the client in the roster, click the three dots next to their name, and choose a cancellation option.
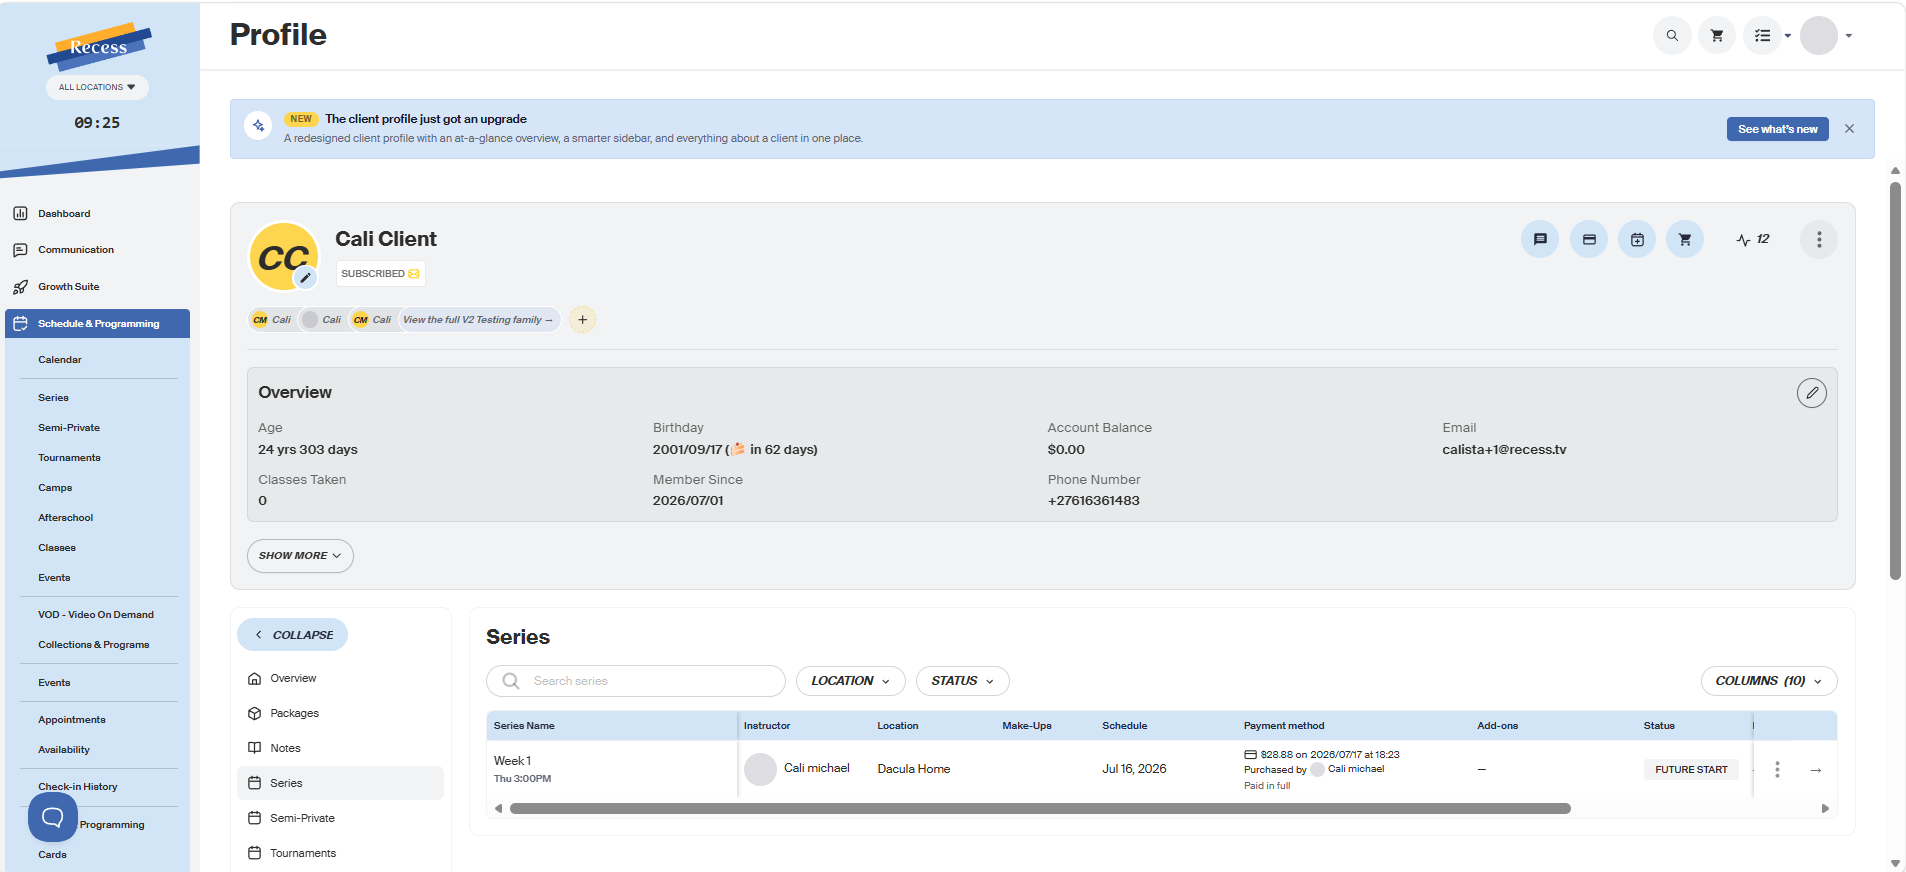
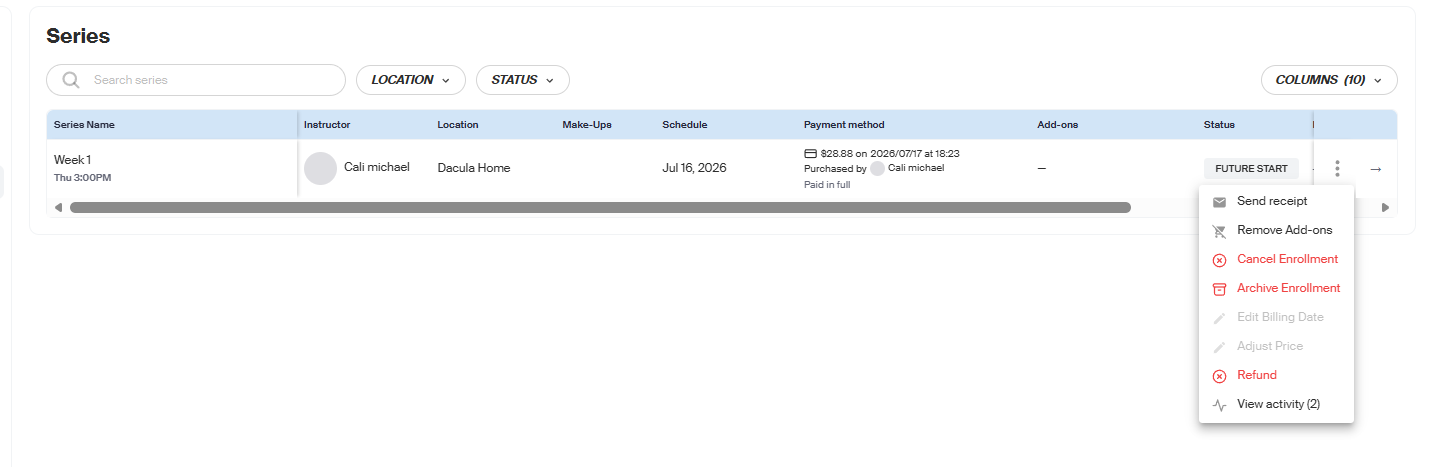
- From the client's profile — go to their profile, click into Series, find the enrollment, and cancel it from there.
When cancelling, you'll typically choose between a few outcomes — cancelling with a refund, cancelling without a refund, or issuing a refund while keeping the client enrolled. Choose a full or partial refund as needed.
Managing Payments
From the client's profile, click into Series to view their payments and payment plan for that enrollment.
Note: If the Series uses Advanced payment mode, admins can adjust the client's billing date directly from this view.
Need Help?
Contact our support team if you have questions about enrolling or managing a client's enrollment in a Series.