
Lead Gen Forms and Managing Leads
This article shows you how to create Lead Gen forms and how to manage leads.
What you will see in this Help Center:
- Lead Gen Forms
- Preview and Embed
- Building an Audience from a Lead Gen Form Tag
- Managing Leads
- Automations
Lead Gen Forms
The below steps cover how to set your default lead gen columns, create a form, and how to embed it into your website.
Edit the default Lead columns
-
Go to Tools > Profile > Settings
-
Scroll down to "Lead Gen"
-
Edit the names, order, and number of columns
-
Scroll up and click save
-
Note: You cannot delete a column that has a lead in it.
Create Lead Gen Form
- Go to Growth Suite > Lead Gen Form.
- Click the yellow plus (+) button.

- Name the form.
Choose a category.
- To create a new category, start typing the name and click Create.

- Choose your settings on the right-hand side.
Create and edit the fields in your form:
- Select which fields are required.
- Arrange the order of the fields.
The following fields will automatically be added to a client profile:
- your email
- question
- However, on the add button you can add more fields of information you need

Important:
- If the person already exists in your database, the form will not override their existing client profile information.
- Email is always required.
- At the bottom, choose what the lead will see after completing the form:
Custom Thank You Page
-
Use the editor to create a custom page.
Automatically add an item to the cart
- A great way to offer a free class, credit, or promotional item.
-
You can also automatically apply a discount code to the cart.
Redirect to another page
- Redirect the lead to another page on your website, such as your schedule or packages page.

- Click Save.
Preview and Embed
Once you are done creating your form you can preview it and embed it into your site.
- To preview: Click the toggle at the top of the page while creating the form.
- To embed the form: Scroll to the bottom of the Lead Gen detail page and copy the embed code.

- Once you toggle on preview, it will ak you to enter your email address to receive the form

Building an Audience from a Lead Gen Form Tag
If you added a tag to your Lead Gen form, you can easily build an audience from everyone who filled it out:
- Click on the lead gen form
- Scroll down to "tags" and click on the pencil
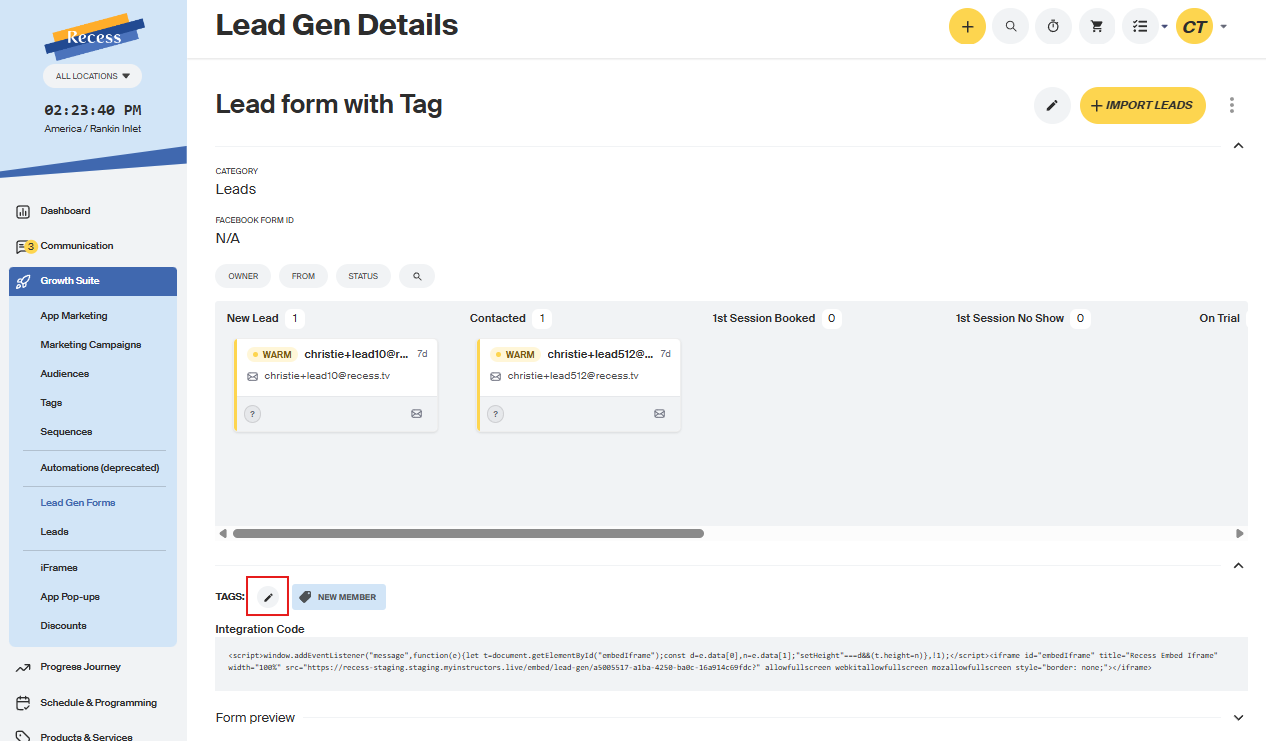
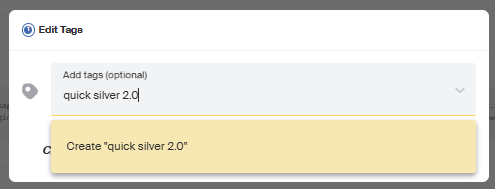
- it will give you the option to add a tag or create one from there by typing in the tag name and click on "create (tag name)."
- Save
- Go to Audiences
- Click Choose Tag that you used on the form to create a new audience
- Select the tag attached to your Lead Gen form
- Everyone who submitted the form will automatically appear in that audience
This is a quick way to target and engage a specific group of leads with campaigns or follow-up emails.
Managing Leads
Once you have your Lead Gen form, and Leads start submitting the form, you will be able to move your leads through the various stages of your Lead funnel.
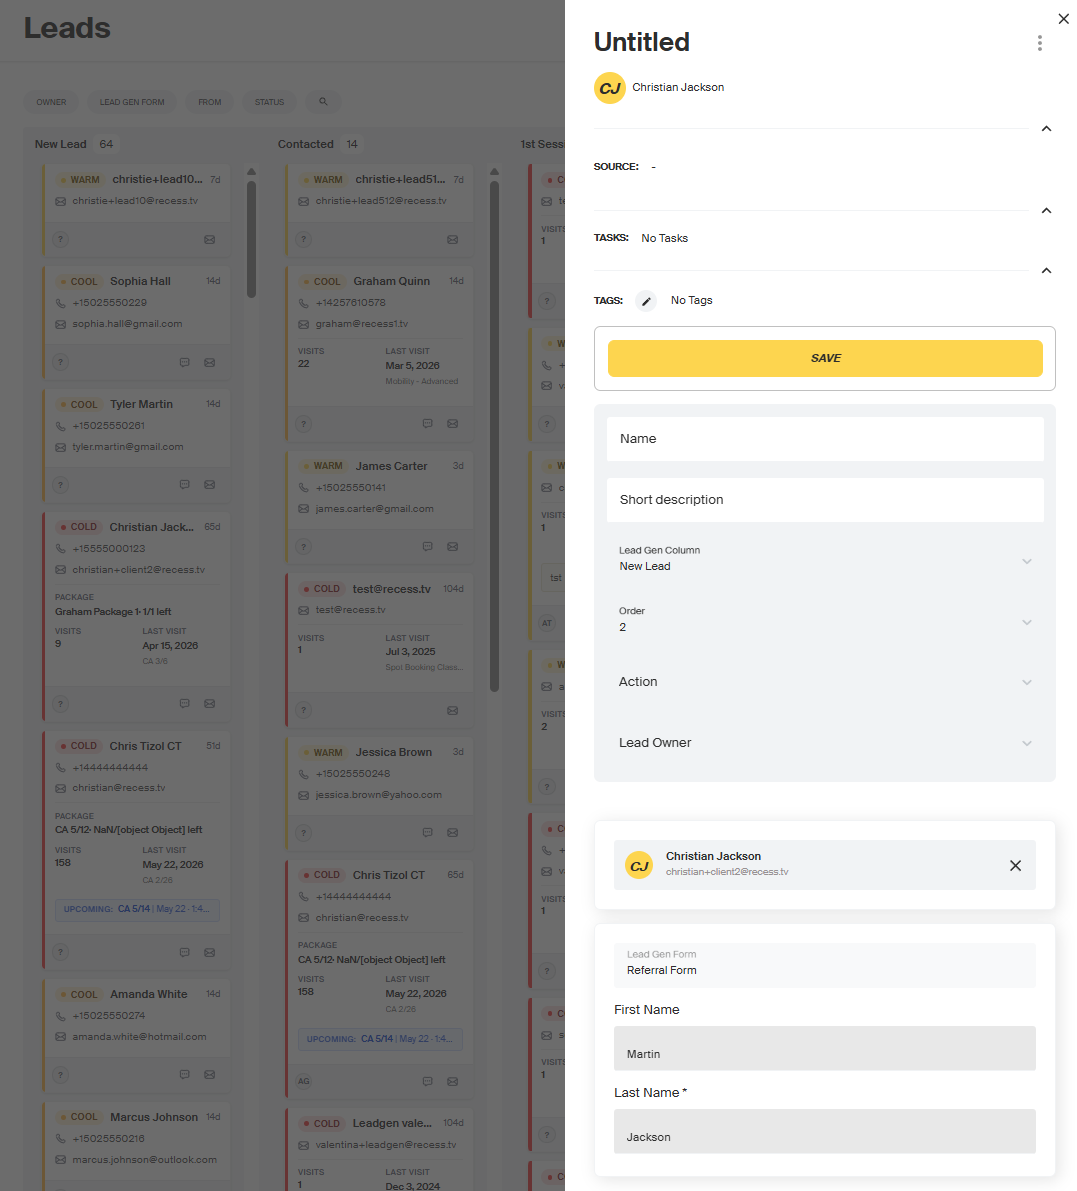
- Go to Growth Suite > Leads.

- Use filters to refine the page by owner, Lead Gen form, and from.

- You will see your columns along with the names of your leads.
Click on a lead to:
- Assign an owner
- Create a task associated with the lead
- Assign an action (Text, Call, or Email)
- Add a short note to the lead
Click and drag a lead to move them through the funnel.
- This is especially helpful for trainers managing their own leads as they make calls, book first sessions, and track progress.
Lead Cards
Each lead appears as a card on the board. Here is what you need to know about them:
- Cards contain additional details about the lead, including any notes, tasks, and assigned actions
- Color coding reflects how long a lead has been sitting in their current column:
- 🔴 Hot - 0 to 2 days in column
- 🟠 Warm - 3 to 7 days in column
- 🔵 Cool - 8 to 14 days in column
- ⚫ Cold - 15+ days in column
- Cards reset when moved between columns - keep this in mind when dragging leads through your funnel, as certain card details will reset when a lead is moved to a new stage
Click on a lead to:
- Assign an owner
- Create a task associated with the lead
- Assign an action (Text, Call, or Email)
- Add a short note to the lead
Click and drag a lead to move them through the funnel. This is especially helpful for trainers managing their own leads as they make calls, book first sessions, and track progress.
Automations
The Lead Gen feature set is powerful on its own, but it becomes even more effective when paired with Automations. There are endless automations you can create to streamline follow-ups and engagement. You can learn more about how to use this feature in our help resources. Here are a few ideas and suggestions:
Create a task automation when a new lead is submitted
- This is a great way to evenly distribute leads to trainers so they can follow up and book free assessments.
Send emails when a lead remains in a column for more than a few days
- Calling leads can be time-consuming—automations can handle follow-ups for you.
- Set the system to automatically text or email leads when they are in specific columns.
- Create custom automations for each column and for different lead gen forms.
Tags lead to create custom audiences
For example, if you collected many leads at a large outdoor fitness festival:
- Create a tag such as “Fitness Festival” for those leads.
- Build an audience and send targeted emails based on that tag.